Capturing the journey: A photographer’s guide to making great photos from your airplane seat
Share
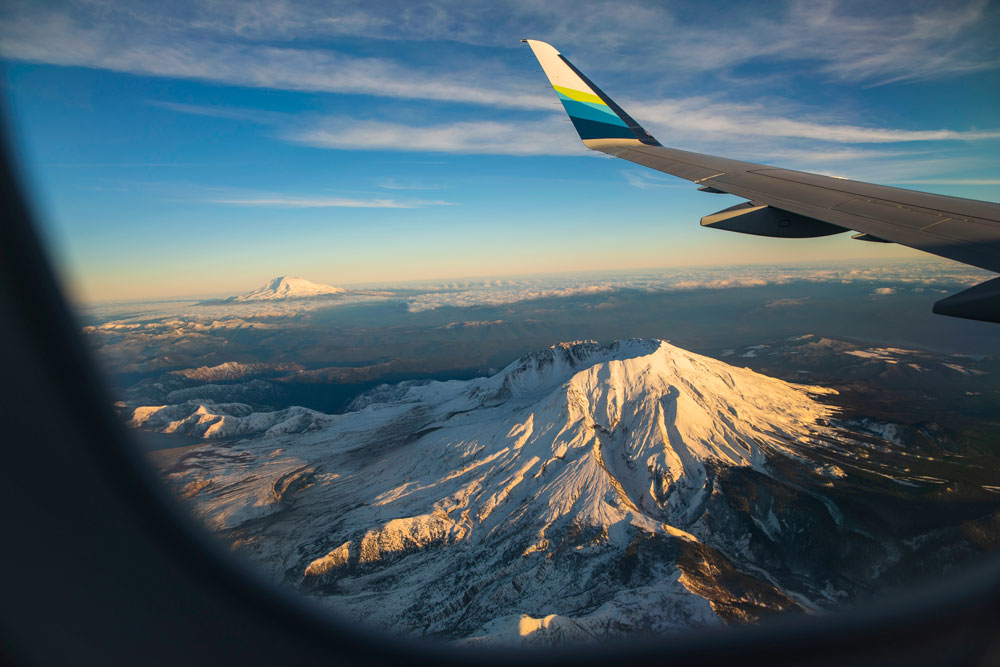
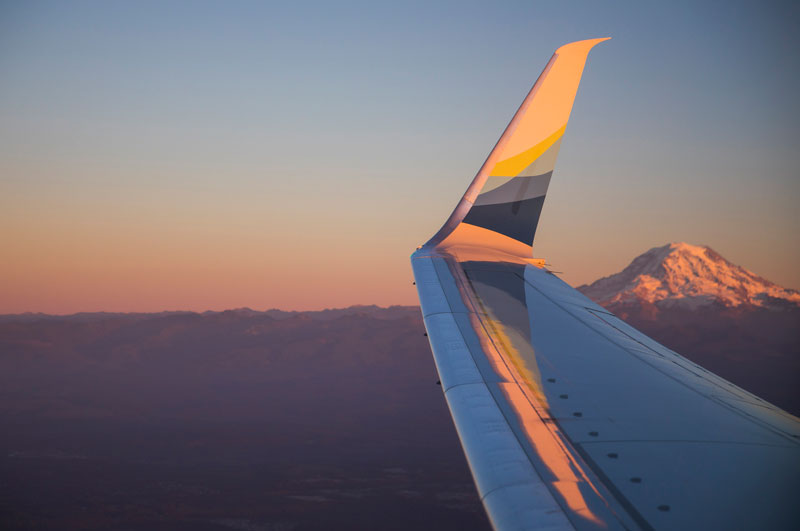
Flying above Mount St. Helens - with Mount Adams in the background - at sunset. Camera data: Canon 5D Mark IV, 24-70 2.8 lens, ISO 100 Aperture 4.5, Shutter Speed 1/400
Photography by Ingrid Barrentine
There’s a bit of a wow factor to the job title, staff photographer at Alaska Airlines. It does include glamorous moments: celebrity partnerships, behind-the-scenes views, and of course, my favorite part – the airplane travel. To be fair, not everything is dazzling. There is constant pressure to deliver perfect images and I spend a lot of days (and nights) away from my two young girls and incredibly supportive husband. But the positives far outweigh any negative as I frequently – meaning, more than 70 flights in the past 12 months – find myself jetting up and down the West Coast.
My love of travel isn’t new. I grew up in a small town where travel meant road trips, and my family of six was good at them. We loved them so much that we took a year sabbatical, crammed into an RV, and meandered across the United States. It was on that trip, while in the red rock canyons of the American Southwest, that I began to see photography as a way of capturing the journey. I was 15 and my father, who loved landscape photography but had discovered an interest in camcorder-crafted video, handed me his Nikon film camera and asked me to help document our adventure. I didn’t know what I was doing, but I was hooked. I had to travel. And I had to travel with a camera. Fast-forward to my first time on an airplane – at 17 – and that wanderlust exploded. I spent the better part of the next few years traveling – with a camera – to Europe, where I worked in Romania as a volunteer educator. Once back in the U.S., I went to school for photography and landed an internship with my local newspaper. Learning how to tell stories with a camera turned into career gold and I’m forever grateful that I get to do what I love. Every. Single. Day.
Enough about me! Let’s talk about my office – the airplane. The romantic notion of photographing air travel can be quickly dashed by the realization that an airplane is NOT an easy place to make nice images. It’s often crowded and you have no control over the light. That said, here are some things you can do to ensure that you document the story of your trip from the start.
What are some tools for creating good photos on a plane?
 Do you own a professional camera or do you make images with your phone? You can capture good photos with both! The key is to plan ahead.
For a DSLR, make sure your ISO and/or shutter speed are high enough to stop motion. Choose a versatile lens. I personally like the 24-70 2.8mm or the 35 or 50 1.4mm. These lenses are small and can be handheld with no issues.
If a phone is your camera of choice, make sure you have enough free memory to handle all your vacation images. And don’t forget your charging cable! Good natural light always helps a phone image look better, so try and snag a window seat. A multitude of apps help make phones powerful storytelling tools. You can capture video, stills, and create time-lapses. Just remember to focus lock on your subject. (Google it for your type of phone.) Photo-retouching apps like Snapseed are affordable and offer a lot of customization options. Social media powers like Instagram allow you to share your adventure in real time. And they provide some pretty fun tools – boomerangs anyone? – to help you get creative as you capture your journey.
What apps might help me take or alter that perfect shot?
For mobile:
Snapseed: A popular image editing app.
Lightroom: The phone app is my mobile editing method of choice.
ImgPlay Pro: A fun gif maker – think IG stories.
iMovie: A great app for cutting video clips on the fly.
Unfold: A lovely IG story layout app. Makes those stories pop!
LightTrac: Want to know where the sun will be at any given moment in a specific location? This is your friend.
FlightAware: This is handy if you’re interested in watching your flight’s path.
For laptop:
Adobe Creative Suite: Photoshop and Lightroom are the perfect tools to edit your images.
PhotoMechanic: A photojournalist’s best friend! And a fabulous software for ingesting, sorting and tagging imagery.
What are three things people can do to get a great shot out an airplane window?
1. Choose a window seat.
It is more challenging to get good inflight images from an aisle seat, so I always opt for the window. Choose your seat based on what side of the plane will have the most interesting scenery. Look up the flight route on a map. And this site lists all aircraft seat maps. For example, if I’m flying from Seattle to California, I’ll choose a window seat on the left side of the plane (the A seats), so that I will be able to capture imagery of Mount Rainier as I’m flying by.
Pro-tip: Add a screen wipe or soft cotton cloth to your travel bag. Sometimes the windows need a little cleaning.
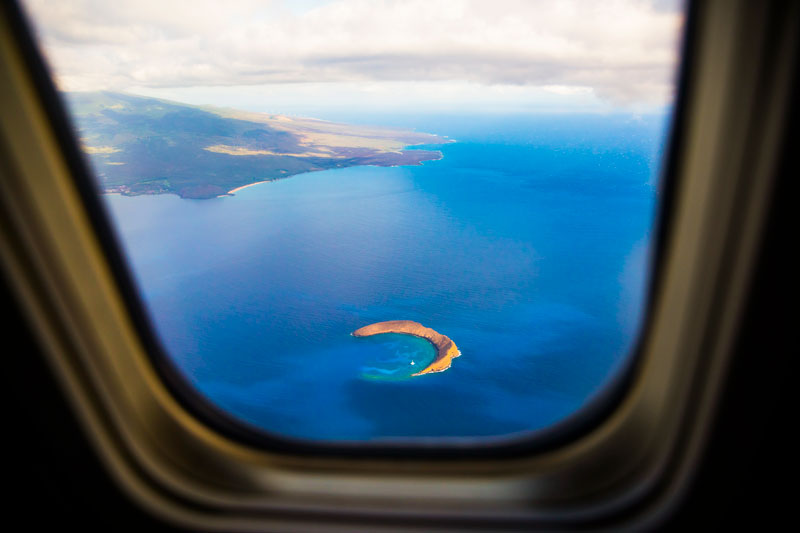
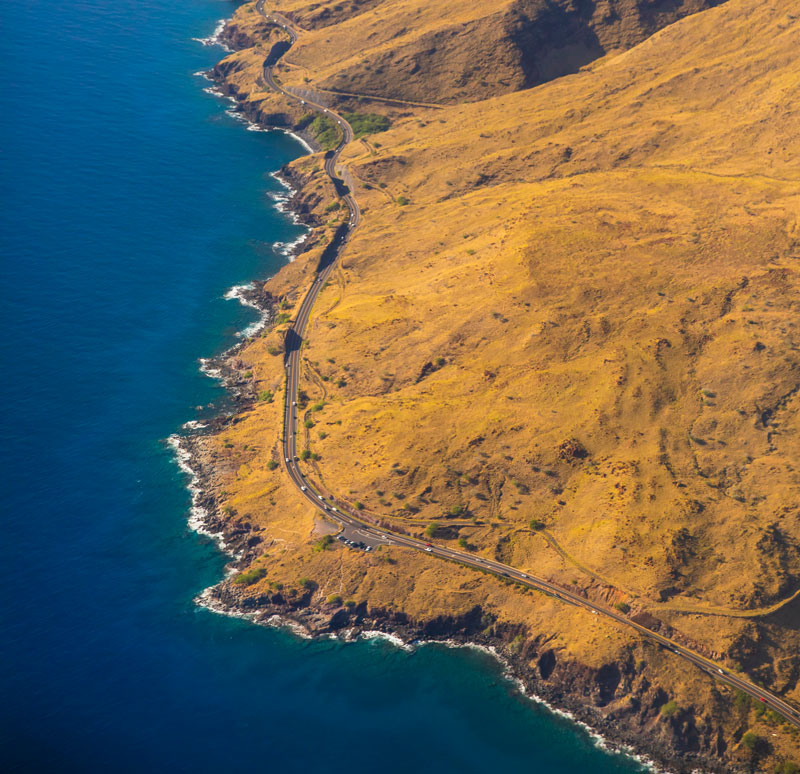
If your window seat is in the front of the plane, you can capture unobstructed views of the landscape like the image of Molokini on the approach to Maui.
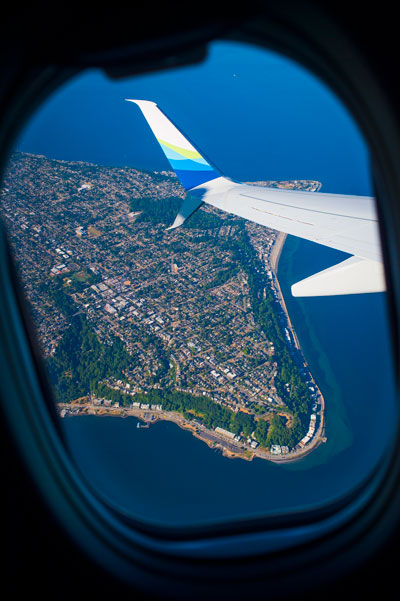
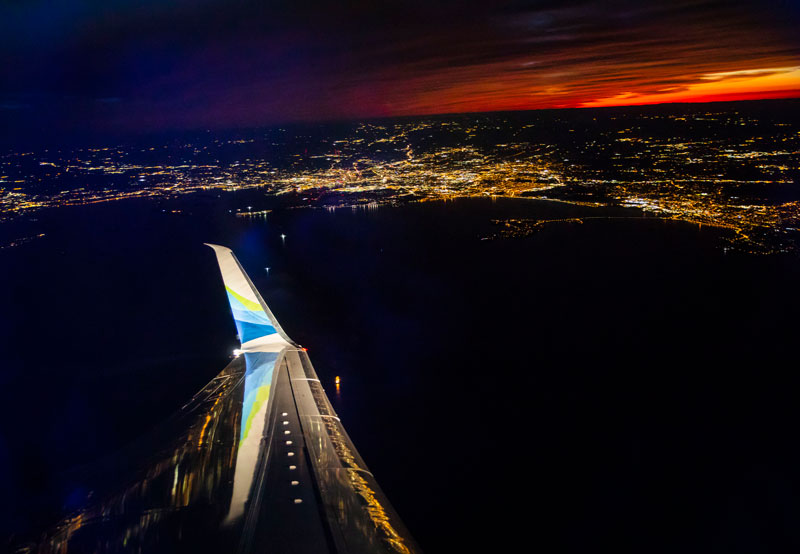
Whereas if you’re sitting on the wing, you’ll have to incorporate it into the view.
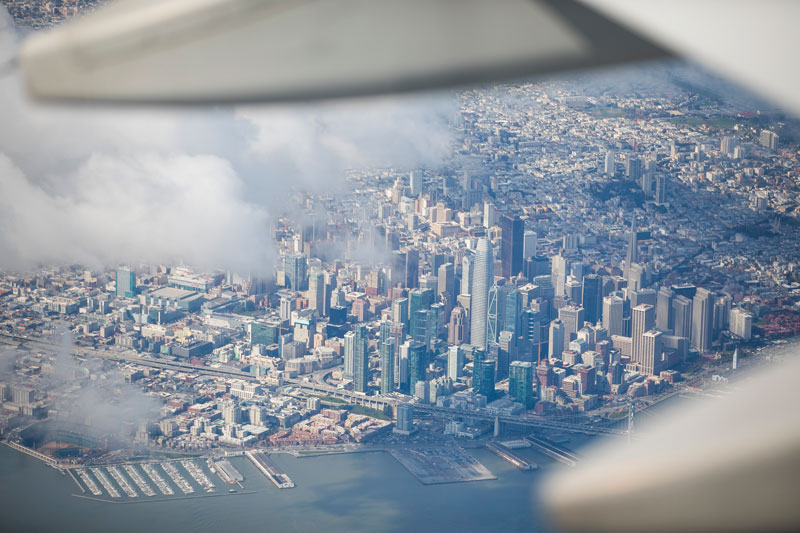
And if your seat is in the back, the wing will frame the landscape below like in this next image above downtown San Francisco.
Pro-tip: If you’re flying to SEA from SFO, choose a window seat on the A side. More often than not, you’ll have a fabulous view of the city as you circle it after takeoff.
Incorporate storytelling aircraft elements like the window or wing to give the viewer a sense of place.
2. Look for the light.
Select your seat based upon the time of day. Do you take off at sunrise? Do you want to shoot into the sun? Will you land at sunset? Look at the route the aircraft will take and if possible, select your seat based on where you want to be to capture the best light.
3. Keep your camera with you at all times.
This sounds like I’m stating the obvious, but if you stow your camera for takeoff and landing, you might miss those interesting angles when you are nearer to the ground. I have my camera and a versatile lens – such as a 24-70mm – in my hands as we ascend and descend. Don’t have a fancy camera? A phone will do! Just make sure it is in airplane mode.
Sometimes the plane circles a destination prior to landing, which can give you an opportunity to capture unique angles.

What is your favorite inflight photo and why?
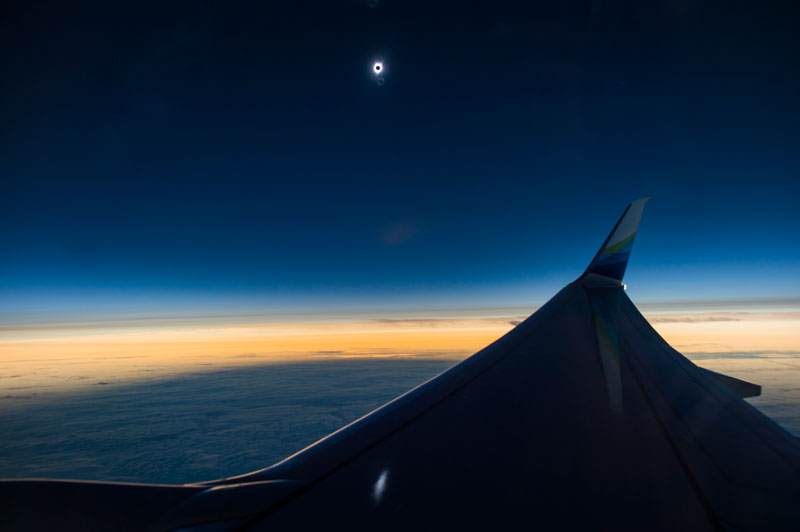
During the Great American Eclipse, I was fortunate to fly with Alaska Airlines and document the event. We had a small window of opportunity to capture totality from 35,000 feet and I wanted to make sure to show an element of the aircraft that was unique to the airline and told the story of us witnessing the event from the air. The pilots and NASA scientists worked their magic and put us in a perfect position to capture the moment. I had 30 seconds to nail the exposure, make sure I had proper focus and line the wing up with the eclipse. Fortunately it worked! The image was shared around the world and the whole experience was one that I won’t soon forget.
What are some fun ideas for documenting your journey on a plane? Especially if you get bored?
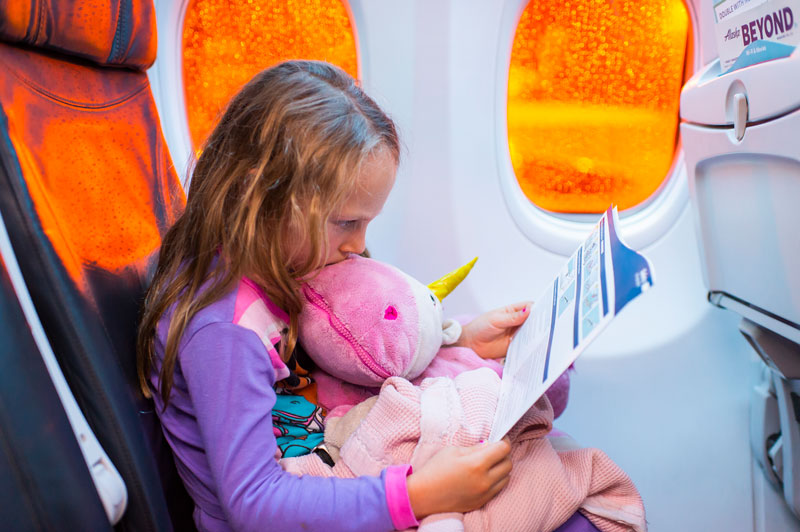
I personally am a fan of the Instagram story. And if you don’t have a fancy camera, it’s OK because you can make a story on your phone! Telling the story of my trip from boarding to landing is always fun. I like to capture my food (cheese plate, anyone?) and beverage and the window seat views along the way. If you get really bored, play around with Hyperlapse of the scenery or clouds going past your window.
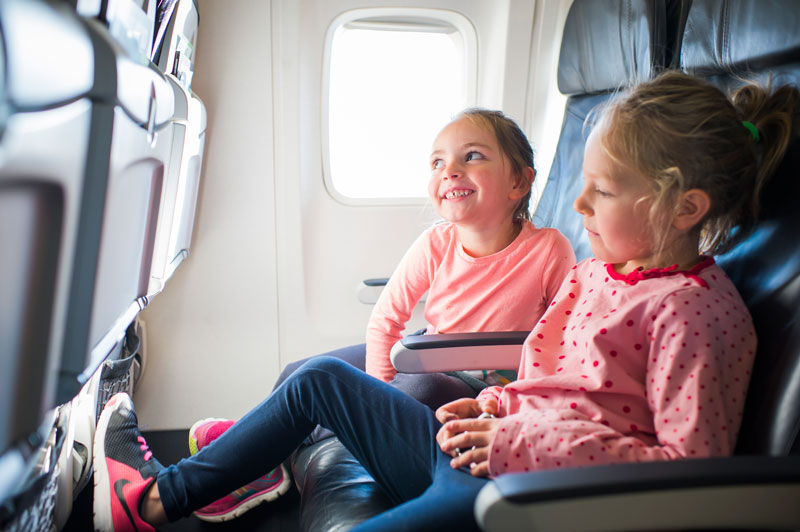
Do you have tips for taking photos of kids while you travel?
I frequently fly with my two daughters and love to watch them process all things travel. From arriving at the airport to takeoff, most kids love to fly. So capturing their excitement is something I enjoy. When we all fly together, I snag the aisle seat and have them take turns at the window (outbound for one, and the return trip for the other). The aisle position allows me to photograph them at the window or together in their seats. As always when traveling with kids, pack your patience! I’ve given up trying to find the perfect angle and instead aim to capture them being them.
Pro-tip: Turn up your ISO and use a wide aperture like f2.8 when you’re on the plane and you’ll have much better results freezing the motion that is a fidgeting child in the darker space of a plane.
What about airports? Any interesting insights to offer people before they get on a plane?
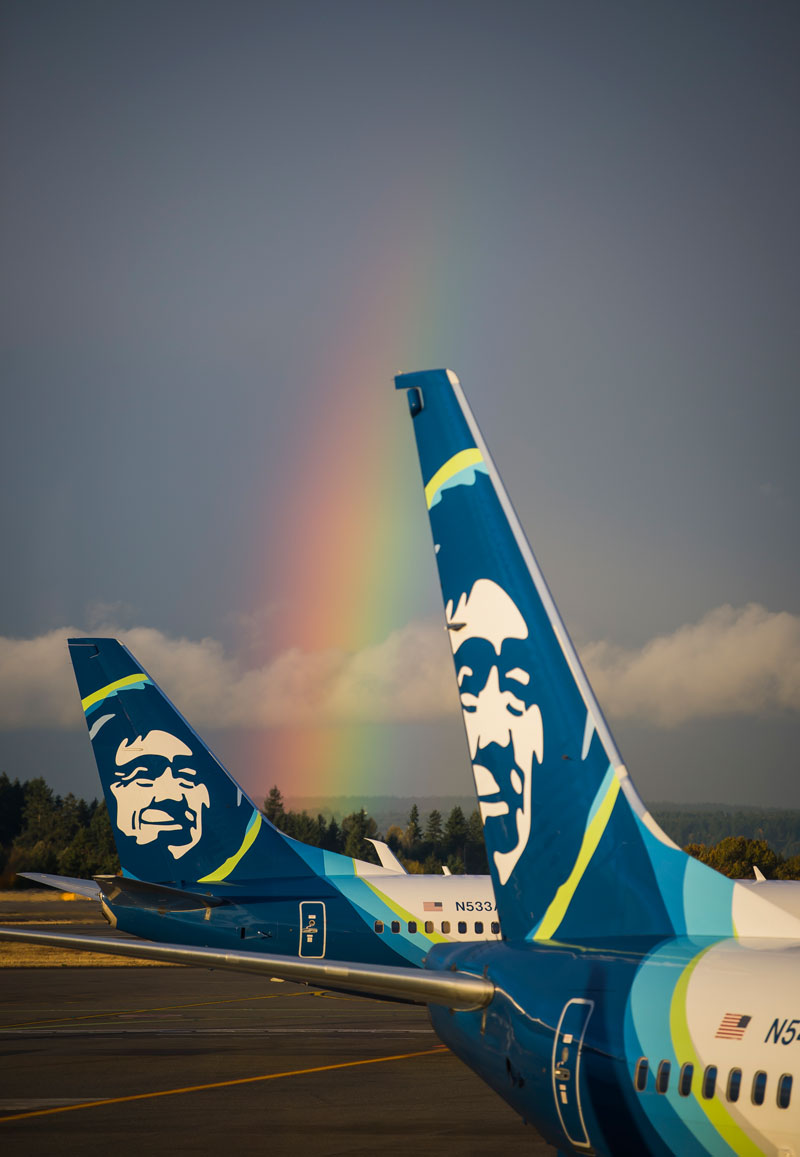
As a frequent flier, I spend a good amount of time in airports. I’ve also purchased a lounge membership so I can grab a pre-flight coffee or snack in a quiet space. When traveling with camera equipment, I try and pack only what I can carry on the aircraft. I keep my cameras close so that I can make images prior to boarding. You never know when you’ll catch a rainbow before your flight!


Comments
Great article Ingrid! Beautiful photos! I’ve personally been enjoying/working in photography for many years (Weddings, portraits, events). For fun, I love taking pictures out the airplane windows. It’s a great reminder to bring a soft cloth to wipe the window. And thank you for the tip on the scratches. If I didn’t love my job at Alaska Horizon so much, I would apply to be your assistant. :))
Often my pictures of the ground through the plane window appear washed out and have a blue tint that don’t appear in your marvelous photos. How do you avoid this or correct for it after the fact?
Thank you for your compliment. If your camera has the ability to shoot in a RAW format, you can adjust the white balance to correct for the blue tint. I personally shoot in RAW and usually leave it at the auto white balance setting and then fine tune it in post – your preferred editing software or photoshop or Lightroom. You can also adjust contrast in post as well. Best of luck to you!
Excellent information!!! I too, have enjoyed photography from an early age starting with film and now invested in digital. It is rare that I travel positive space so as a space available traveler, our choices of seats is outside of our control especially when the flight is full and the only seats available are aisle and/or middle. Regardless, I will keep your info and recommendations handy and will use it when I can. Thank you.
Thanks for the great article. I actually travel quite a bit (always sit at the window) and carry a decent point and shoot with me to shoot pics when possible. Have got some nice ones flying on AS metal. One thing that’s always a huge bummer is when the outer window is dirty and/or has scratches (not uncommon). Makes taking photos in flight or on the ground impossible 🙁 One tip for those flying just to take pics is to try to book flights where aircraft type is known to be younger / newer model. Chances are windows will be cleaner. The other issue I see more and more in this era of everyone watching visual entertainment in flight is folks not being happy with me keeping the window shade open when everyone else has closed theirs. Depending on the route flown, the best entertainment is outside the window, not on the iPad. One last one….if you fly on a Boeing B787 keep in mind that the windows do not have physical shades. The darkness level is controlled electronically via a 5 level polarizer. Though this can be controlled individually, most Dreamliners have a an override control at the FA control station. FA’s can override whatever is set and make it all go dark if they want. 🙁 Even if they allow the window to remain “open” photo taking is a challenge, most pics have an overly bluish tint to them. One has to mess with their lighting source adjustment on their camera -or- via software to compensate accordingly.
Hi, Bruce! Thank you for your insight. I don’t know if your point and shoot has the ability to adjust aperture, but if you can shoot at an open aperture – 2.8 or greater – you’ll sacrifice your depth of field, but window scratches will be minimized. It’s also how you can shoot “thru” a chainlink fence. I’ve never flown on a Dreamliner (we don’t have them in our fleet). So – I will definitely prepare myself for those special windows when I get the chance. If you shoot in RAW, you can adjust the white balance so that will help with some of the blue tint issue. Or if you have Photoshop – use the RAW converter to adjust white balance. Happy Travels!
Thanks Ingrid for the additional tips, particularly setting aperture as open as possible. I normally forget and leave it in Auto only changing to Shutter Speed priority at 1/1000 or higher for the bumpy roll down the runway. Opening aperture I suppose would also apply to a window full of rain or dew drops. 🙂 Also thanks for the tip on adjusting White Balance. I do shoot JPEG and RAW so its doable. Even though AS doesn’t have Dreamliners hopefully someday you’ll have a chance to fly one, very impressive passenger comfort oriented airplane 🙂
Comments are closed.